Android 多条件筛选简单实现
最近要实现一个多条件筛选,类似这个效果:
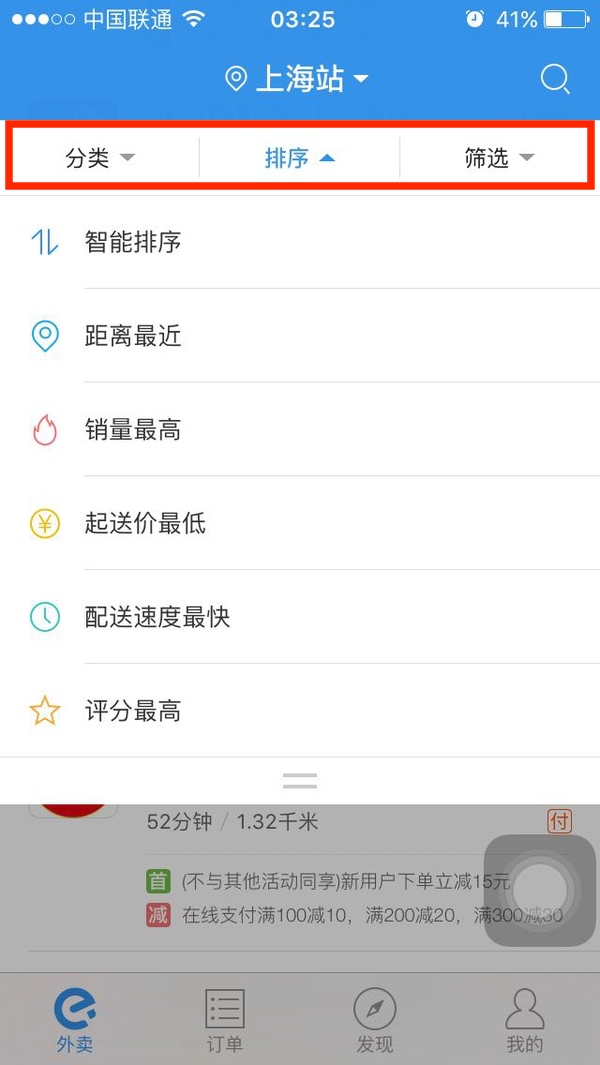 Demo
Demo
如何实现
1.首先想到用PopupWindow实现,但不够理想,麻烦的地方在于:上图红色框的区域!这部分应该是一开始就显示了的,弹出PopupWindow后,我们就没法再操作这部分了,除非在PopupWindow上实现一个一模一样的view,但这样就有两个一样的view,当其中一个改变时,另一个可能需要同步改变。太麻烦,于是,放弃这个方向。
2.网上这方面的封装库都是页面view和筛选view合并在一起封装的,不能说不好,但感觉这样灵活性就低了,能不能将筛选条件的view当做一个控件来实现呢?我希望的实现效果如下:
<xxx.xxx.xxx.CustomLayout
        android:layout_width="match_parent"
        android:layout_height="wrap_content">
        <!-- 第一个布局是顶部layout ,可以是一个view,也可以是一个ViewGroup-->
        <TextView
            android:layout_width="match_parent"
            android:layout_height="48dp"
            android:text="点击弹出条件筛选框"

            />
        <!-- 第二个布局是筛选条件的layout,可以是一个view,也可以是一个ViewGroup -->
        <TextView
            android:layout_width="match_parent"
            android:layout_height="200dp"
            android:text="具体筛选条件的布局"
            />

    </xxx.xxx.xxx.CustomLayout>
只需要在对应的位置,写上所需的布局,就能实现弹出效果。最终效果如下:
 效果图
效果图
实现过程
1.自定义一个layout:DropDownMenu
public class DropDownMenu extends RelativeLayout {

    //顶部的view
    private View viewTop;
    //筛选条件的view
    private View viewMenu;
    //遮盖层的view
    private View viewMask;

    private Context mContext;
    //判断当前状态
    private boolean mIsOpen = false;

    public DropDownMenu(Context context) {
        this(context,null);
    }

    public DropDownMenu(Context context, @Nullable AttributeSet attrs) {
        this(context, attrs,0);
    }

    public DropDownMenu(Context context, @Nullable AttributeSet attrs, int defStyleAttr) {
        super(context, attrs, defStyleAttr);
        this.mContext = context;
        initView();
    }

    private void initView(){
        //添加一个遮盖层
        addMaskView();
        //检查是否满足要求
        checkLayout();
    }

    /**
     * 检查是否满足条件(需要view绘制完成才能检查)
     */
    private void checkLayout(){
        post(new Runnable() {
            @Override public void run() {
                //检查父布局是否满足要求
                checkParentLayout();
                //检查子view的数量
                checkChildCount();
                viewTop = getChildAt(1);
                viewMenu = getChildAt(2);
                //默认是隐藏的
                viewMenu.setVisibility(GONE);
            }
        });
    }

    /**
     * 检查DropDownMenu所在的容器布局,如果是LinearLayout,抛出错误
     */
    private void checkParentLayout(){
        ViewGroup viewGroup = (ViewGroup) this.getParent();
        if(!(viewGroup instanceof FrameLayout)){
            throw new RuntimeException("ParentView must is FrameLayout ");
        }
    }

    /**
     * 检查子view的数量,最多只有三个(有一个是遮盖层)
     */
    private void checkChildCount(){
        if(this.getChildCount()!=3){
            throw new RuntimeException("Only two child view support!");
        }
    }
    /**
     * 添加一层遮盖层(只有在展开情况下,才会显示遮盖层)
     */
    private void addMaskView(){
        if(viewMask!=null){
            return;
        }
        viewMask = new View(mContext);
        RelativeLayout.LayoutParams params = new LayoutParams(LayoutParams.MATCH_PARENT,
            ViewGroup.LayoutParams.MATCH_PARENT);
        viewMask.setLayoutParams(params);
        //灰黑色透明背景
        viewMask.setBackgroundColor(0x60434444);
        //添加view
        addView(viewMask);
        //默认是隐藏的
        viewMask.setVisibility(GONE);
    }

}
在布局初始化的时候,检查自定义layout(DropDownMenu)的所在的父容器是否是FrameLayout。这里不能是LinearLayout,因为DropDownMenu是可以展开收缩的,高度是不确定的,如果父布局是LinearLayout,当DropDownMenu发生变化时,LinearLayout下的其它view也会随着变化。
在布局初始化时,添加了一个遮罩层viewMask,那么按照绘制的流程,viewMask最先被绘制,然后是viewTop,最后才是viewMenu。现在布局已经准备完成,一个是遮罩层viewMask,用于提供半透明的view,另外两个分别是viewTop和viewMenu,在使用时再具体的实现的布局。
添加动画
展开动画
/**
     * 展开动画
     */
    private void openAnimation(){
        //设置展开的基准位置,从顶部开始展开(默认是中心位置展开收缩)
        viewMenu.setPivotY(0);
        ObjectAnimator scaleY = ObjectAnimator.ofFloat(viewMenu,"scaleY",0f,1f);
        scaleY.setDuration(300);
        viewMenu.setVisibility(View.VISIBLE);
        scaleY.addListener(new Animator.AnimatorListener() {
            @Override public void onAnimationStart(Animator animation) {
            }

            @Override public void onAnimationEnd(Animator animation) {
                if(viewMask!=null){
                    viewMask.setVisibility(View.VISIBLE);
                }
            }

            @Override public void onAnimationCancel(Animator animation) {

            }

            @Override public void onAnimationRepeat(Animator animation) {

            }
        });
        scaleY.start();
    }
关闭动画
/**
     * 收缩动画
     */
    private void closeAnimation(){
        viewMenu.setPivotY(0);
        ObjectAnimator scaleY = ObjectAnimator.ofFloat(viewMenu,"scaleY",1f,0f);
        scaleY.setDuration(300);
        scaleY.addListener(new Animator.AnimatorListener() {
            @Override public void onAnimationStart(Animator animation) {

            }

            @Override public void onAnimationEnd(Animator animation) {
                viewMenu.setVisibility(View.GONE);
                if(viewMask!=null){
                    viewMask.setVisibility(View.GONE);
                }
            }

            @Override public void onAnimationCancel(Animator animation) {

            }

            @Override public void onAnimationRepeat(Animator animation) {

            }
        });
        scaleY.start();
    }
给筛选view弹出添加动画,这里使用的是缩放动画,也可以考虑使用位移动画。
到这里基本已完成自定义layout了,完整代码。
如何使用
在布局中:
<FrameLayout xmlns:android="http://schemas.android.com/apk/res/android"
    xmlns:app="http://schemas.android.com/apk/res-auto"
    xmlns:tools="http://schemas.android.com/tools"
    android:layout_width="match_parent"
    android:layout_height="match_parent"
    tools:context="com.example.dropdownmenu.MainActivity"
    >

    <com.example.dropdownmenu.DropDownMenu
        android:orientation="vertical"
        android:id="@+id/dropDownMenu"
        android:layout_width="match_parent"
        android:layout_height="wrap_content">
        <!-- 第一个布局是顶部layout -->
        <TextView
            android:id="@+id/view_top"
            android:layout_width="match_parent"
            android:layout_height="48dp"
            android:background="@color/colorAccent"
            android:text="点击弹出条件筛选框"
            android:gravity="center"
            android:textColor="@android:color/white"
            />
        <!-- 第二个布局是筛选条件的layout -->
        <TextView
            android:id="@+id/view_menu"
            android:layout_below="@+id/view_top"
            android:layout_width="match_parent"
            android:layout_height="200dp"
            android:background="@color/colorPrimaryDark"
            android:text="具体筛选条件的布局"
            android:gravity="center"
            android:textColor="@android:color/white"
            />

    </com.example.dropdownmenu.DropDownMenu>

</FrameLayout>
注意这里父布局使用FrameLayout.
在activity中:
public class MainActivity extends AppCompatActivity {

    private DropDownMenu dropDownMenu;

    @Override protected void onCreate(Bundle savedInstanceState) {
        super.onCreate(savedInstanceState);
        setContentView(R.layout.activity_main);

        dropDownMenu = (DropDownMenu)findViewById(R.id.dropDownMenu);
        TextView textView = (TextView) findViewById(R.id.view_top);
        textView.setOnClickListener(new View.OnClickListener() {
            @Override public void onClick(View v) {
                if(!dropDownMenu.isOpen()){
                    dropDownMenu.open();
                }
            }
        });
    }
}


