OmniGraffle 7 的 Artboards 功能详解
有一段时间曾使用 OmniGraffle 来绘制原型,但 OmniGraffle 并没有 Windows 版,考虑到有时候在家会用 PC,所以还是用 Axure 作为主力工具。今天偶然发现 OmniGraffle 已经出了7.0版,其中新增的 Artboards 功能引起了我的兴趣。我敢打赌这是从 Sketch 得到的灵感,连名字都一模一样。是否存在抄袭暂时不去追究,单就这一更新来说,OmniGraffle 已经有成为产品设计师的主力工具的潜质。
为什么这么说呢?先来看看目前主流的几款绘制原型的工具。
- Axure:这一款大家应该很熟悉了,面市时间早,入门容易,可以制作丰富的交互效果,Windows&MAC 都兼容,非常多的产品经理和交互设计师都将其作为主力原型工具。不过因为定位的问题,图形功能就欠缺了,8.0版本倒是增强了,比如有了路径绘制工具,但要拿来画图还是不够。
- Sketch:这一位最近几年风头正劲,越来越多的UI设计师从 Photoshop 转投 Sketch 的怀抱。从UI设计方面来说,Sketch 确实是目前最佳选择,不过要说将其作为原型绘制工具,我一直很犹豫,原因这里就不展开,后面有时间我来详说。
其他的工具其实还有很多,毕竟绘制低保真的原型不需要太强大的功能,能画基本的几何形就可以。比如有的设计师就喜欢用 Keynote,有的还在用 Fireworks。就我个人而言,目前还是 Axure 用的最多,毕竟用了多年,另外团队里一直都有专职的视觉设计师,我绘制的原型主要还是阐述产品逻辑、流程和功能,所以感觉 Axure 基本还够用。不过我也能感到 Axure 在移动端设计方面的不足,比如只能按页面导出图形,如果想把界面按屏导出就得做二次加工,这样想用POP之类的工具做可点击的演示原型就比较麻烦。
再说回 OmniGraffle,Omni 系列的软件口碑一向不错,OmniGraffle 在 MAC 上也是老牌的图形工具了。从原型绘制的角度来说,功能完全能够胜任。比如绘图,应该没有它画不出的图形了;Stencil(类似模板)库丰富多彩,可以把自己常用的元件打包成Stencil后续项目调用,也可以去网上下载现成的资源直接使用;导出功能也很强大,PNG、PDF、HTML都可以。现在又有了 Artboards 这个功能,我可以说 OmniGraffle 已经是 MAC 上最好的低保真原型工具了。
如果你心存怀疑,那就跟我来看看这个 Artboards 到底是何方神圣。
注:下文主要参考官方文档翻译而成,原文请见:
Artboards 是 OmniGraffle Pro 独享功能。Artboards 可以用来定义导出区域,也可以作为一个容器将元素放置其中。
举个例子,你可以将 Artboards 用在以下场景:
- 定义需要的边界
- 导出多种分辨率的切片(比如 normal, 100%, @5x 500%)
- 作为容器放置元素,以实现某些交互效果
- 还有更多其他可能...
你很快就可以发现,Artboards 将会成为你手中强大的工具。
理解Artboards
添加 Artboard Layer 或者 Artboard 元件 最快的方式就是使用 Artboard Tool:
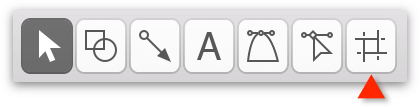 The Artboard Tool, is a crosshatch of four lines that form a square.
Artboard 跟 OmniGraffle 里的一般图层不同。比如,你在 OmniGraffle 里添加一个新图层,新图层会自动添加在原有图层的上方。
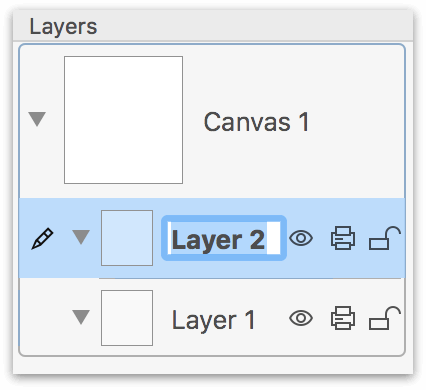 Adding a New Layer to the project places Layer 2 above Layer 1 in the Layers sidebar.
但是,如果你添加一个 Artboard Layer(Edit ▸ Layers ▸ New Artboard Layer),Artboard Layer 会自动添加在图层下方。
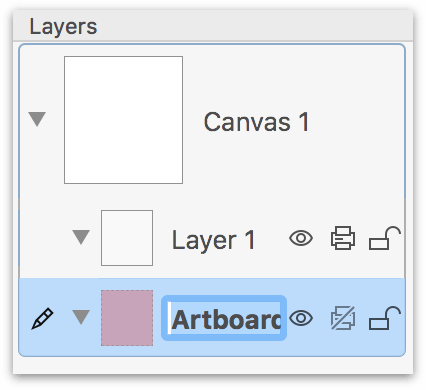 Adding an Artboard Layer to the project places it underneath Layer 1
这些微妙的差异是经过深思熟虑的,因为 Artboard 是用来管理行为和导出切片。事实上,新添加的 Artboard Layer 都会自动放置在当前所在图层的下方。你可以理解为 Artboard Layer 只会影响在它上方的元件。
和普通图层一样,文件里可以创建多个你需要的 Artboard Layer ;但是一个文件并不需要一定要有一个 Artboard Layer ,而普通图层则至少会有一个。所以当不需要 Artboard Layer 的时候,就不用创建(这个跟 Shared Layers 类似)。
Artboard Objects 是如何影响其他图层上的元素的
最直观的,artboards 会影响在它上方图层里的元素。比如当你移动一个 artboards 元件,在它上方图层的元素(无论是包含还是相交)都会跟着移动。
为了帮助描述这一点,来看个例子:
- 创建一个新 OmniGraffle 文件,已经有一个默认图层 Layer 1
- 添加一个普通图层,系统自动命名为 Layer 2
- 在 Layer 1,使用形状工具画一个正方形
-
在 Layer 2,使用形状工具画一个正圆形,注意圆形和方形需要有一部分重叠,如:
 The canvas with a square and circle
- 在工具栏选择 Artboard Tool
-
画一个 artboard,让它与 Layer 2 上的圆形一部分重叠,如:
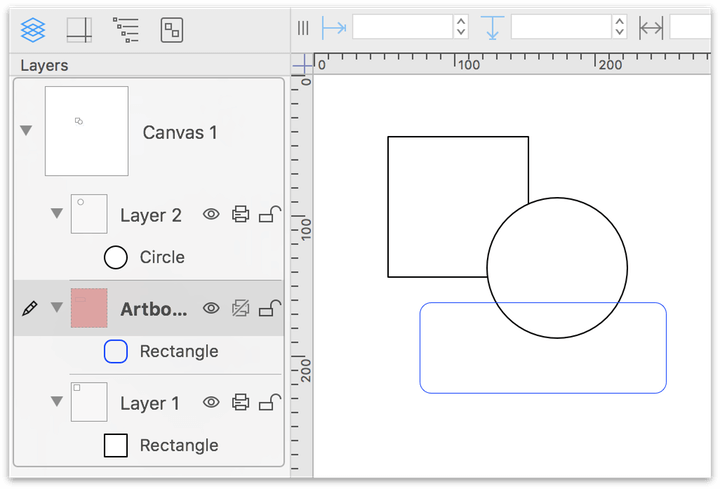 Adding the artboard layer to the project
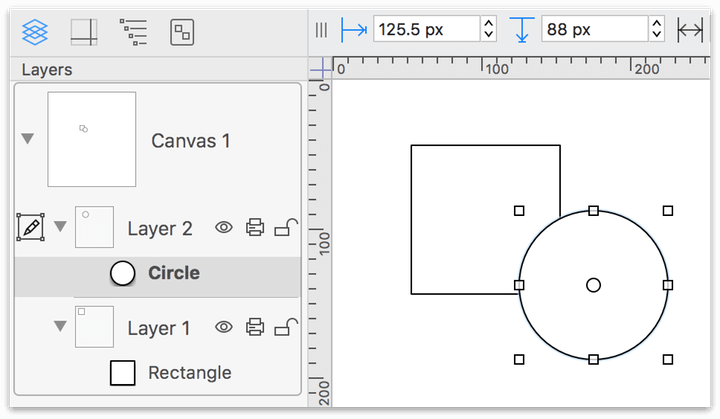
如果你可以看到 Sidebar,可以注意到 Artboard 在 Layer 2 和 Layer 1 之间。
-
把 Artboard 拖到最下方,这样 Layers 1 and 2 都在 Artboard 上方
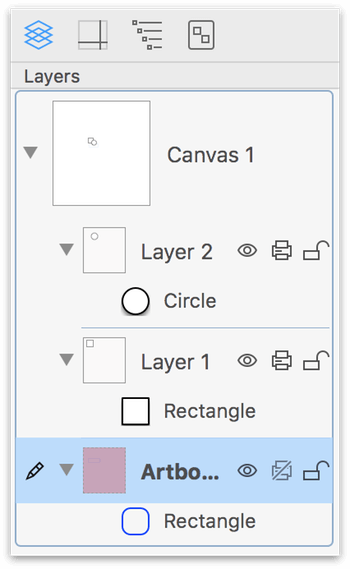 The Sidebar, showing the layer stack with the artboard layer at the bottom
现在在画布上拖动 Artboard 元件,可以看到 Layer 2 上的圆形跟着一起移动,而 Layer 1 上的方形仍在原地。这是因为圆形与 Artboard 元件重叠,而方形没有。
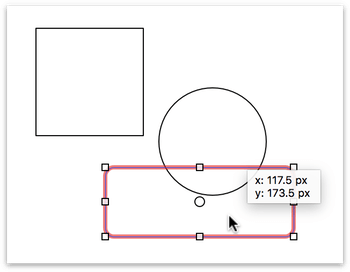 Moving the circle on Layer 2 along with the artboard.
将 Artboard 作为容器使用
在 OmniGraffle 中一般使用“Group”来管理一组具有一定关系的元素。Artboard 在一定意义上也可以起到类似作用。比如,选择想管理的一组元素,选择菜单 Arrange ▸ Make Artboard (Shift-Command-A),也可以右键选择 Make Artboard,这样就以这些元素的边缘为界创建了一个新的 Artboard 元件。可以移动这个 Artboard 元件,其中包含的元素也会跟着移动。
用 Artboards 工作
Artboards 在实际运用中有两种方式:
- 如果你能预见文件的尺寸(比如画一个icon),可以先创建一个 Artboards,然后在其中绘图
- 另一种情况是已经绘制好了图形,然后通过 Artboards 来定义导出边界
用 Artboards 定义设计稿区域
假设你创建了一家造火箭的新公司,MasterBlasters,然后你打算使用 OmniGraffle 完成所有的设计 - 公司LOGO、网站原型、手机App。
网站组需要一个 1080 × 256 像素的透明 PNG 图片,App组需要一个 512 × 512 像素的 PNG 图标。
在以前,导出不同尺寸的图片极其麻烦。你要创建不同尺寸的设计稿文件,然后分别导出需要尺寸的图片。而现在,只需要两个 artboard objects。而且还可以通过设置 Export Sizes 很方便的导出不同分辨率的图片。
这就是 artboard 图层和元件强大的地方。让我们开始实际操作一番!
-
创建一个新文件。
-
选择 Artboard Tool,按住 Shift 在画布上画一个 256 × 256 px 的方形。
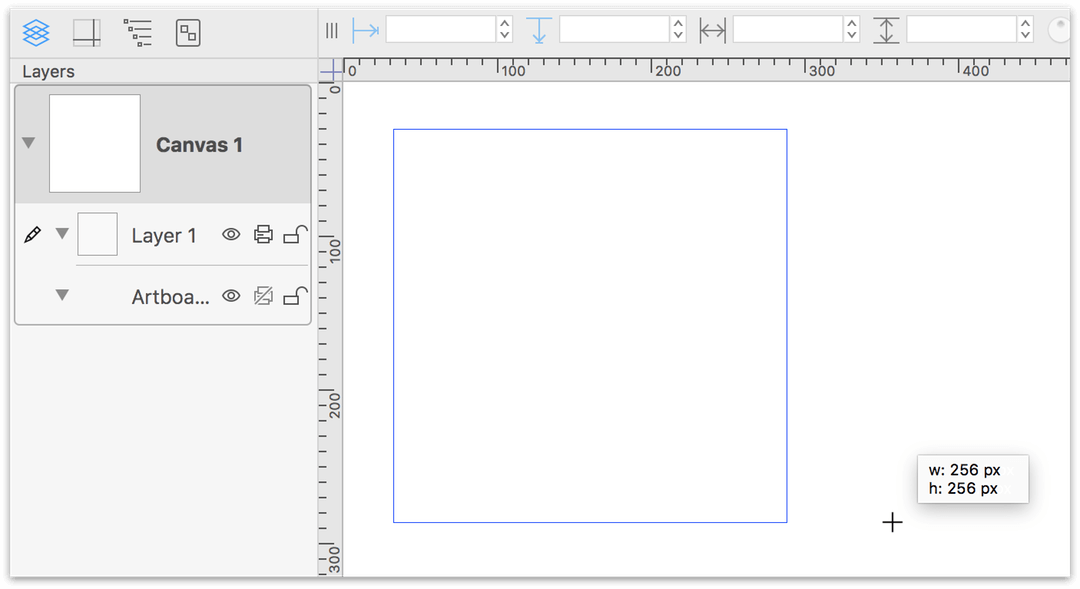 Draw the first artboard, a 256 pixel square
-
在 检查器(Inspect)Object面板,Shape处将圆角设置为 8pt。
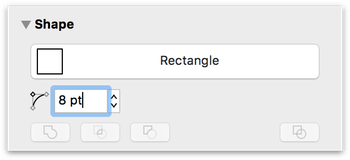 Setting the artboards corner radius to 8 points
-
在 Sidebar 双击 artboard 名称,修改为app-icon:
 Changing the name of the artboard in the Sidebar
注意在 Siderbar 中,Artboard 是以红色背景显示,这样可以很容易与普通图层区分。 -
点击选择刚才绘制的 Artboard 元件。
-
按住Option键,点击并且拖动Artboard 元件,创建一个副本。
-
在 Sidebar 将新的 Artboard 元件改名为 web-banner:
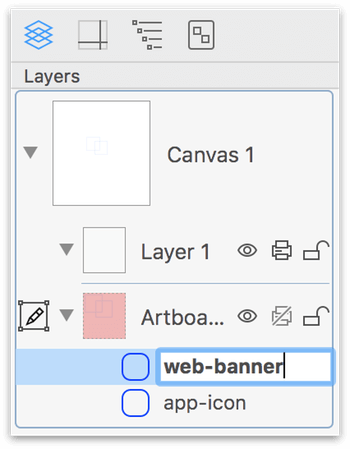 Change the name of the duplicated artboard in the Sidebar
-
在画布上点击选择 web-banner artboard。
-
在检查器面板Geometry处将 web-banner artboard 的宽度修改为1080像素:
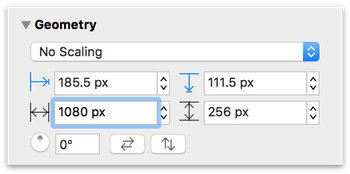 Use the Geometry inspector to change the width of the artboard to 1080 pixels
-
然后,如果想让两个 artboard 居中对齐,按下Command-A(选择全部)选择两个 artboard。
-
在检查器面板Alignment处,点击下面的图标将两个 artboard 居中对齐:
 The Align Vertical Centers button
 The Align Horizontal Centers button
 The artboards are perfectly centered on each other
现在就可以开始设计工作了,跟往常的工作没有区别。
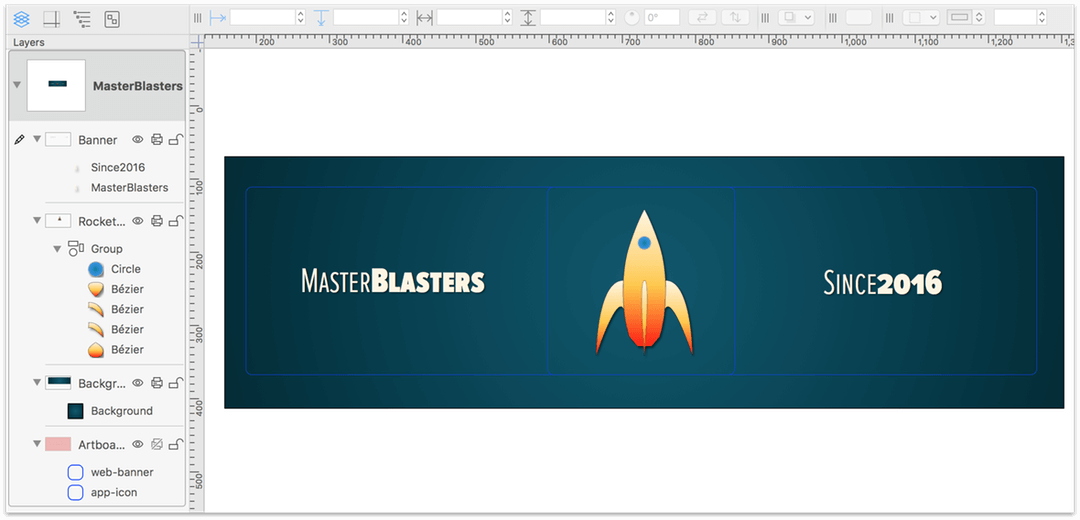 The entire project, showing the Sidebar and the canvas
用 Artboards 导出图片
在菜单栏点击File ▸ Export (Option-Command-E),打开导出面板。在导出面板右边是预览界面,在这里可以看到将会导出的图片。
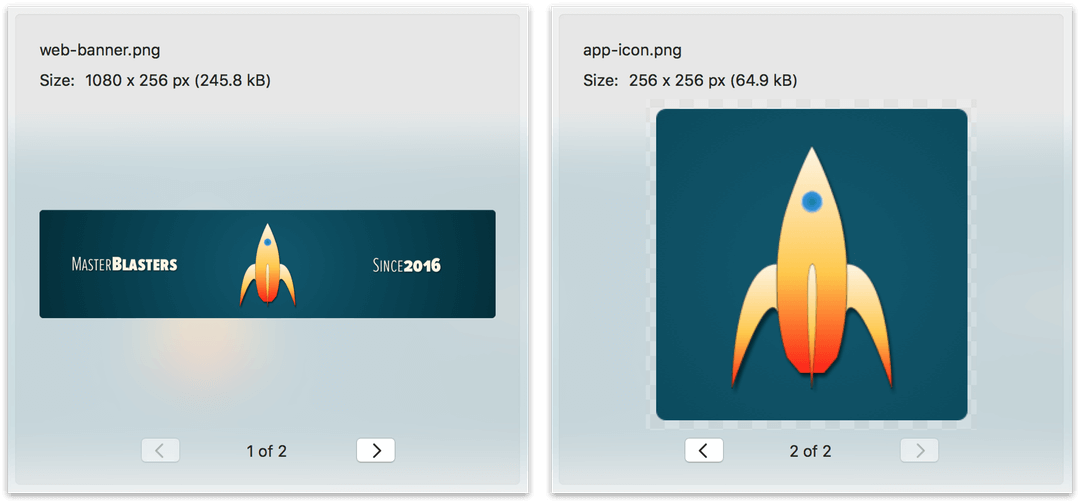 The Preview section of the Export panel, showing two different images as determined by the Artboard Layers and Objects.
切片默认按100%比例导出,你可以在 Export Sizes: 添加新的规格。
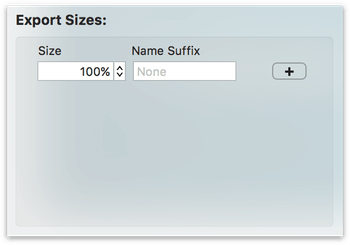 The Export Sizes box on the Export panel
点击右边的 + ,可以添加一个新的切片比例,默认为 200% @2x
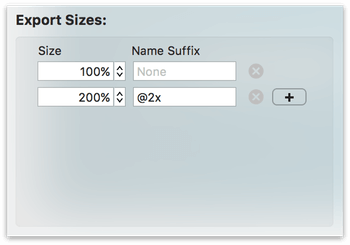 Adding at two-ex resources
这时候在预览区域你可以看到有4个切片可以导出:2个100%切片,2个200%切片。
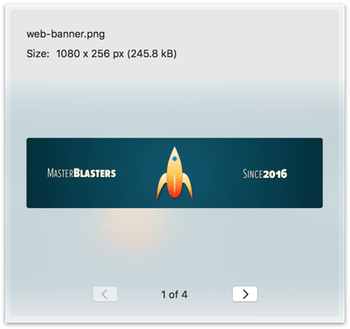 The Export Preview now shows that there are four images to be exported.
点击 Export 按钮,弹出保存界面,在 ** Where** 处选择保存的位置,在 Export As 处输入将会创建的新目录名称。点击 Save 按钮,切片将会保存在新创建的目录里。
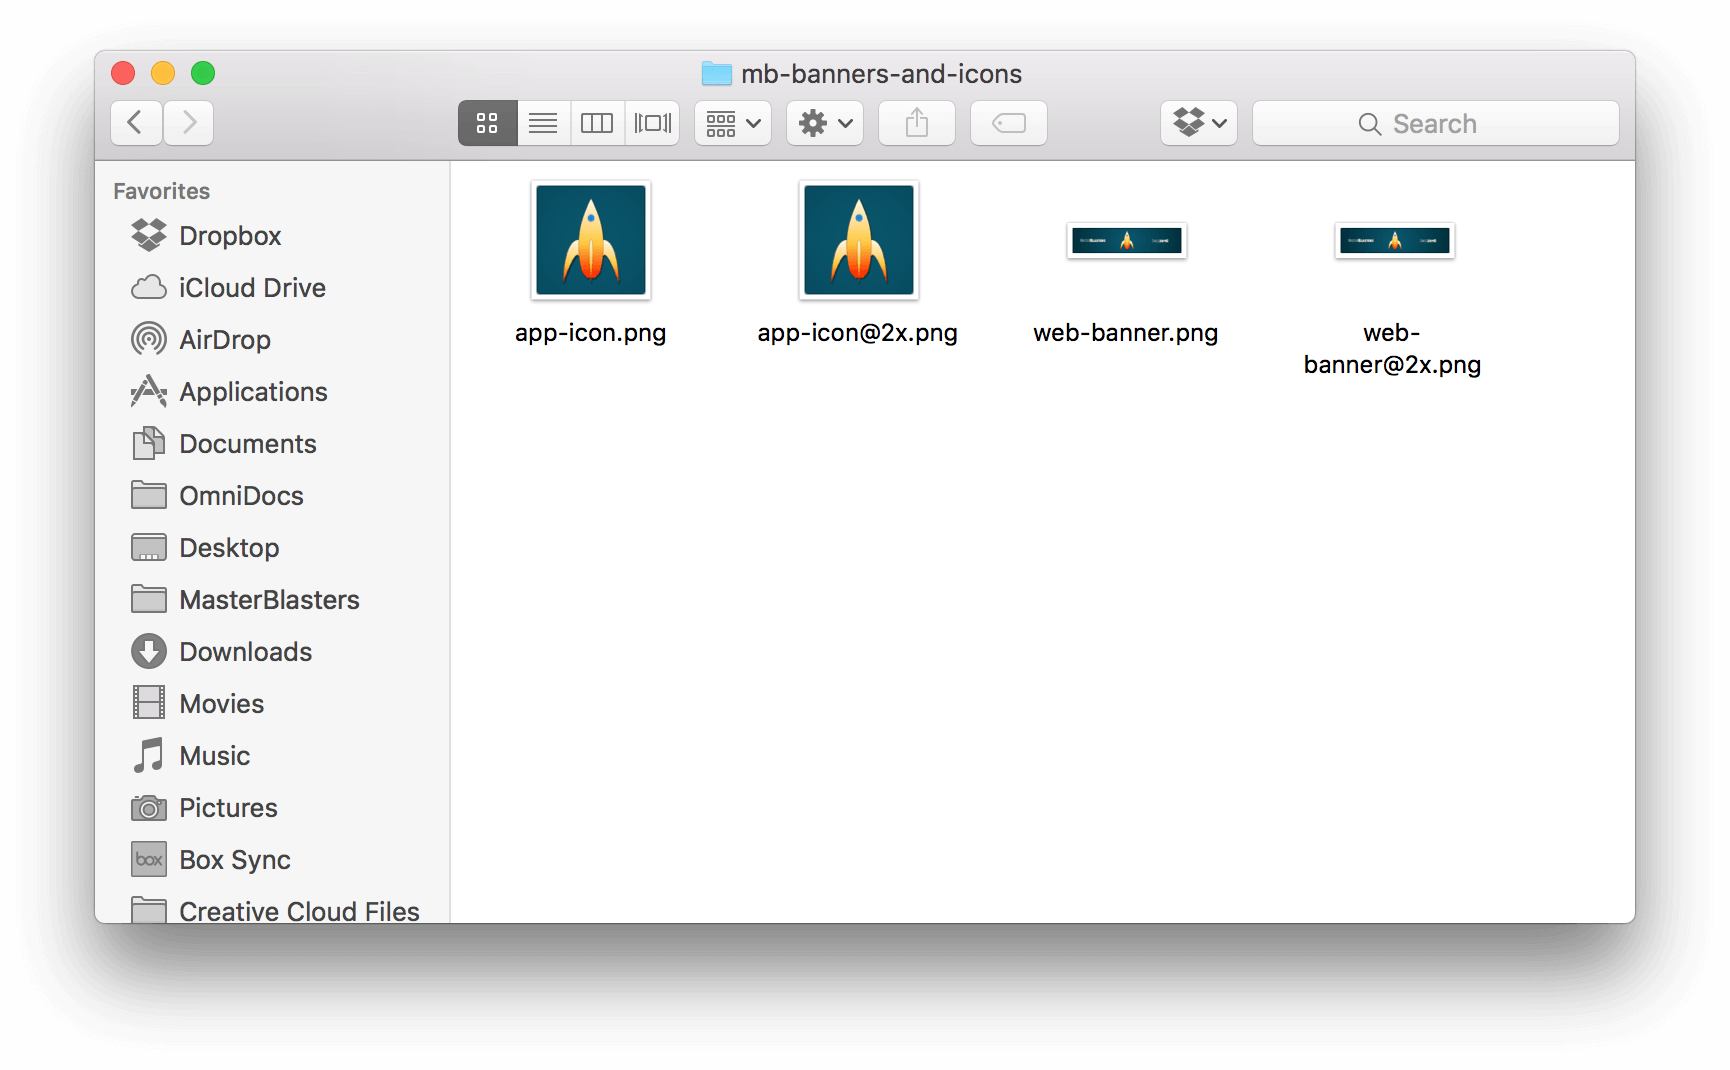 A Finder window, displaying the four image files exported from OmniGraffle
在已有的项目中添加 Artboard
现在你应该明白了 Artboard 是如何运作的了。除了一开始就添加 Artboard,更多时候我们会选择先做好设计稿,然后再选择想导出的切片区域,添加的方式是一样的,只要记住一点:Artboard 只影响在它位置上方的图层。


